
Creagh House Replicating an 18th Century Struck Joint
Annapolis, MD: 2005
|


|
|
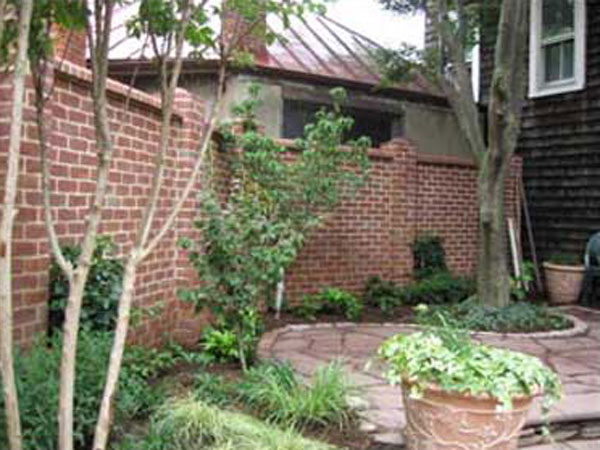
The Creagh House, built in 1737, had undergone many changes and additions throughout the 19th and 20th centuries, but still intact were the building's 18th century bricks and the distinctive struck joints of the period. When the owners needed a privacy wall for their backyard, they wanted a brick wall constructed in the 18th century style, but were unable to reconcile their design with the city's modern building codes. We were able to design a solution that facilitated both needs: the wall would be built to code, but would have a skin of brickwork laid and pointed in the same 18th century methods as the house.
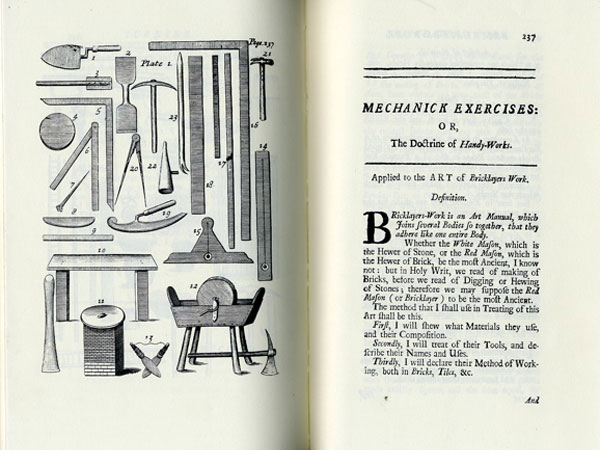
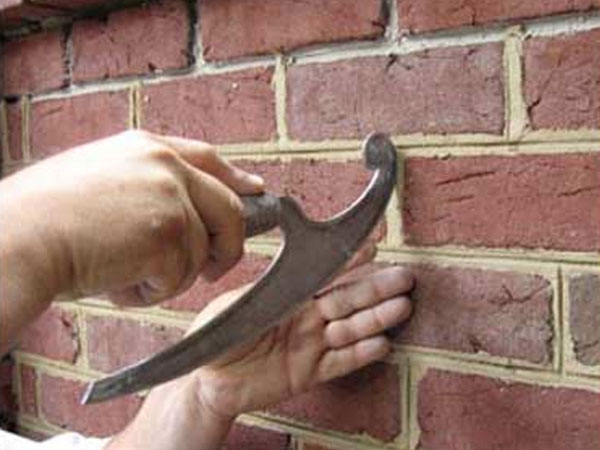
In the late 1700s when struck-joint work like this was common, joints were finished by a separate team of masons using distinctive finishing tools. Apprentices would hold the end of a straightedge that could be up to ten feet long, which allowed the lead mason to walk along its length briskly striking the fresh mortar. In Joseph Moxon's Mechanick Exercises or the Doctrine of Handy-Works published in 1678, we found a plate depicting a once common tool for striking joints. We recreated this "Moxon" tool to a specific thickness to emulate the 18th century struck line of the Craegh House brickwork. And in lieu of apprentices, we designed an adjustable striking guide that our masons, Terry Hooker and Garrett Brown, could set up easily and accurately.
Terry and Garrett, both skilled modern masons, understood the necessity of being trained in the older methods of masonry. Modern masonry practices do not translate effectively to historic masonry projects. For example, the modern grapevine tool, with which most masons will be very familiar, must be dragged along the arrises of the bricks on either side of a joint. This is perfectly acceptable when using modern, manufactured bricks. But when using handmade bricks a grapevine tool would only accentuate the brick's unevenness instead of creating a sense of uniformity where it doesn't actually exist. After just a little training, Terry and Garrett were able to use the Moxon tool proficiently.
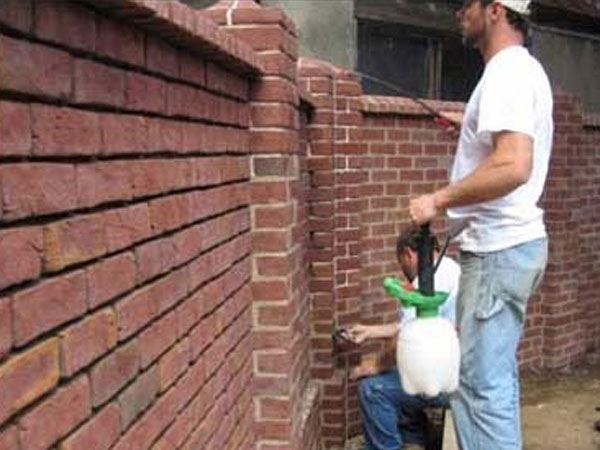
Our pointing process had other unique steps that might be unfamiliar to a modern mason. First and most important was the wetting of the bricks and joints. We cannot overemphasize the importance of keeping the joints wet before, during, and after pointing. True lime mortar is not hydraulic like portland cement, meaning it needs to remain damp in order to cure. Lime mortar cures by losing its free water at the same time it is absorbing CO2 from the atmosphere, forming calcium carbonate. If the interior of the wall is too dry it draws the water out from the freshly laid lime mortar too quickly, which disrupts this carbonation process and causes the lime mortar to fail. We had to keep the wall damp; not just the brick faces, but the entire depth of the wall. So we focused the water into the joints with a pump sprayer. How often the joints were re-wet was based on these factors: the porosity of the brick, the relative humidity, temperature, windiness, and whether the working area was in shade or direct sunlight. The back of your hand is sensitive to even one or two degree changes in temperature and is a good way to measure the wetness and workability of different areas. The warmer the wall, the drier it is; the cooler the wall, the more damp it is.
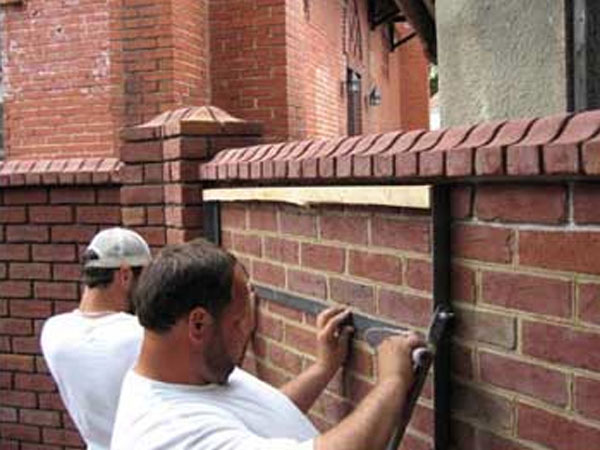
The second unique step was in finishing and tooling the joint. As brickwork ages, the mortar closest to the brick arris is eroded from acid rain, wind, cleaning, etc. So to give our new mortar the aged and weathered look of the main house, we cut away the mortar from the joint edges with the tip of the trowel which exposed the arris. Timing is crucial; you only have several minutes from the time the finishing mortar is laid in place. Otherwise the mortar tears or it is too hard to make an imprint. Terry and Garrett set up the straightedge rig and promptly struck the joint with a straight line using the Moxon tool. The Moxon is versatile, able to be used for striking horizontal and vertical joints.
Lastly, when we finished the wall, we kept it protected from rain for only a few days. Lime mortars, unlike portland cements, like a little rain. Complete carbonation, which adds strength and longevity to the joint, occurs as the wall is saturated by slightly acidic rainwater. So protecting walls from rain beyond the first few days is counterproductive. Several days after we finished the last pointing on the wall we removed the protection.
About a week after the brickwork was finished, we used a solution of equal parts store-bought vinegar and water to clean any excess mortar off the edge of the bricks. Because we kept the wall wet by hydrating the joints and not the brick faces, the cleanup process was easy. If the brick faces had been repeatedly soaked throughout pointing, the bricks would have stained from the lime mortar and it would have been difficult to get any mortar off the brick face. It was still important to keep the interior wall thoroughly wet before, during, and after even a relatively gentle and targeted acid clean up so that calcium acetate salts created in this cleaning process would be washed off.